
3D Printer Explainer Video
Case Study
Project Design and Implementation is a course offered at RIT that allows students to create a semester long project. Students can choose from two areas of focus, either a UX/UI redesign project or a motion graphics explainer video about something mechanical. For this project I chose to create a motion graphics piece that would explain how a 3D printer worked, as it is something that has always interested me.
Planning
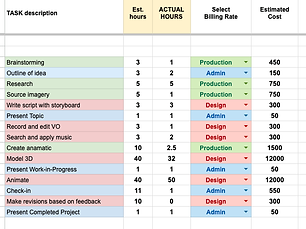
I started the project by brainstorming and creating a list of tasks that I would need to complete over the semester. This was scheduled out in a google project management sheet. I included estimated dates and hours.
Research
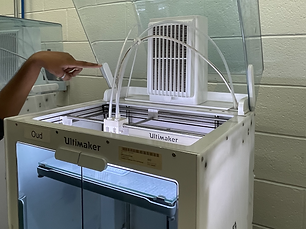
Next I began to research exactly how 3D printers worked, the types available, and what level of detail I wanted to include in my project.

Script and Storyboard
Now that I knew what type of 3D Printer I wanted to showcase, I was able to write up a script and send it to my voice talent. From there I created an animatic setting the actions to the dialogue.

Building
With a plan in place I could start building out my assets in Cinema 4D. I enjoy modeling and it was fun to try and recreate a high level of detail. when I was satisfied with the model I began to light and texture everything in Redshift.

Animate and Render
When creating the project plan I did not allot nearly enough time for rendering which is what took up a majority of the project. Even thought I used multiple computers it took at least 48 hours to render sections.
Editing
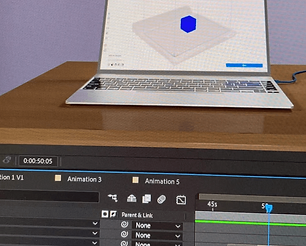
I brought all of my rendered animations into After Effects, where I combined it with the voice over, music ,and finished it with simple transitions. I included credits and rendered the final piece.
Final Product
This was an excellent learning experience, and I am very happy with the finished product. My key takewayas were to be more detailed in the project plan up front and plan for suprise roadblocks like rendering times.